LYO เป็นผลิตภัณฑ์ที่ดูแลผู้ที่มีปัญหาด้านนี้โดยตรง
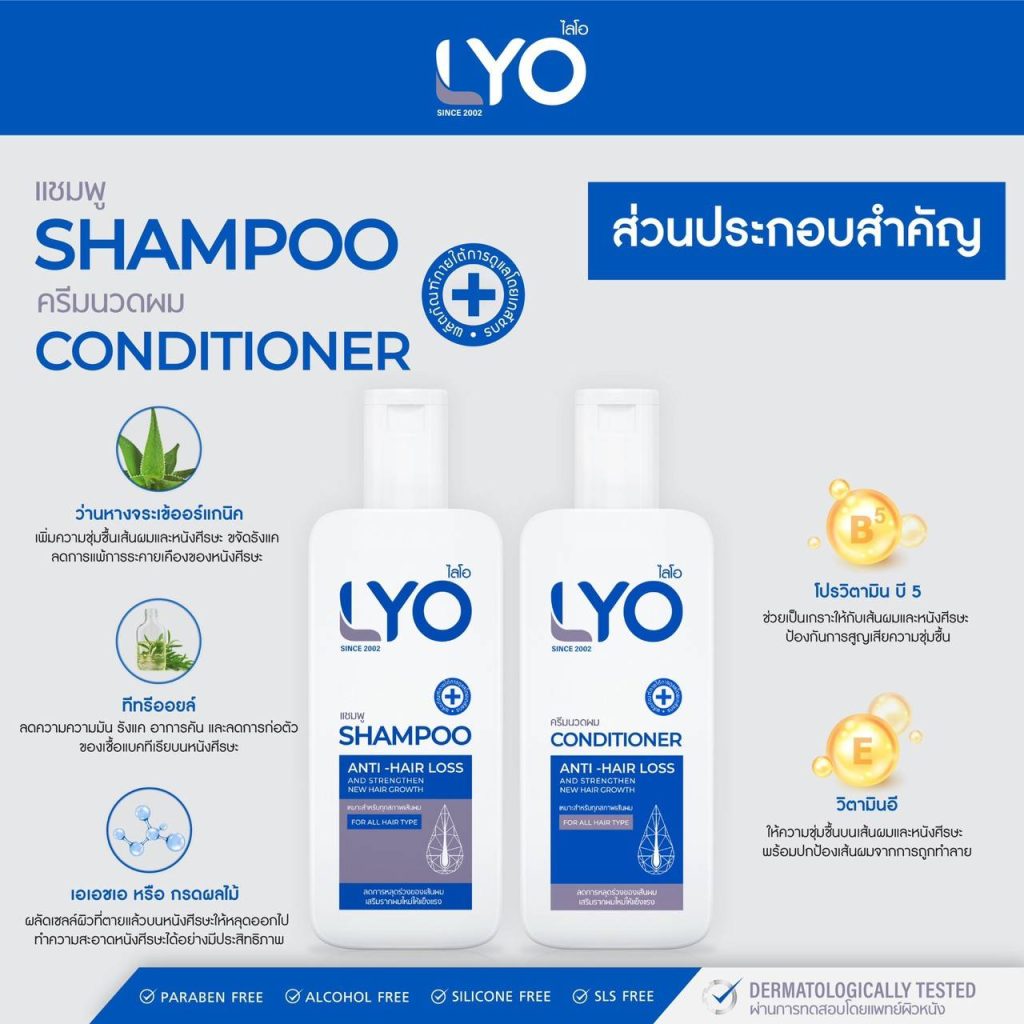
1. LYO Shampoo ราคา 680 บาท สำหรับขั้นตอนการสระผม LYO ขอเสนอแชมพูที่มีส่วนผสมของว่านหางจระเข้ออร์แกนิค ให้ความชุ่มชื้นแก่เส้นผมและหนังศีรษะ ขจัดหนังศีรษะ ลดอาการแพ้ระคายเคืองหนังศีรษะ น้ำมันทีทรี มีความมัน ลดขุย คัน ลดอาการคัน การก่อตัวของแบคทีเรีย AHA หรือกรดผลไม้บนหนังศีรษะและช่วยผลัดเซลล์ผิวที่ตายแล้วบนหนังศีรษะ Pro-Vitamin B5 ช่วยทำความสะอาดหนังศีรษะอย่างมีประสิทธิภาพและช่วยปกป้องเส้นผมและหนังศีรษะ ป้องกันการสูญเสียน้ำและวิตามินอีให้ความชุ่มชื่นแก่เส้นผมและหนังศีรษะและปกป้องผิวจากความเสียหาย
Ryo แชมพู ขนาด 200 มล. เลขที่จดแจ้ง 20-1-6300041682 ใช้ได้ประมาณ 1-2 เดือน (แล้วแต่แต่ละบุคคล) ต่อแชมพู ทำความสะอาดเส้นผมและหนังศีรษะลดผมร่วง ลดความมันบนหนังศีรษะ ลดอาการคันและขจัดรังแค
3.LYO Hair Tonic Lyo Hair Tonic ราคา 1,590 บาท เป็นแฮร์โทนิคที่แรงมาก ช่วยบำรุงเซลล์รากผมอย่างล้ำลึก ปรับสมดุลและเสริมสร้างหนังศีรษะและรากผม กระตุ้นการงอกใหม่ของเส้นผม ช่วยให้รากผมแข็งแรงและชะลอผมขาวก่อนวัยที่หลุดร่วงยาก ช่วยให้ผมหนาและดำ บำรุงรากผมใหม่
Ryo Hair Tonic เป็นสารอาหารสำหรับเส้นผม ช่วยกระตุ้นหนังศีรษะบริเวณที่เคยเป็นเส้นผม และฟื้นฟูให้เส้นผมนุ่มสลวย หลังมาอีกครั้งควรใช้ผมใหม่อย่างต่อเนื่องจนแข็งแรงเหมือนผมธรรมดา จึงลดการใช้วันละ 2 ครั้ง เช้าและเย็น
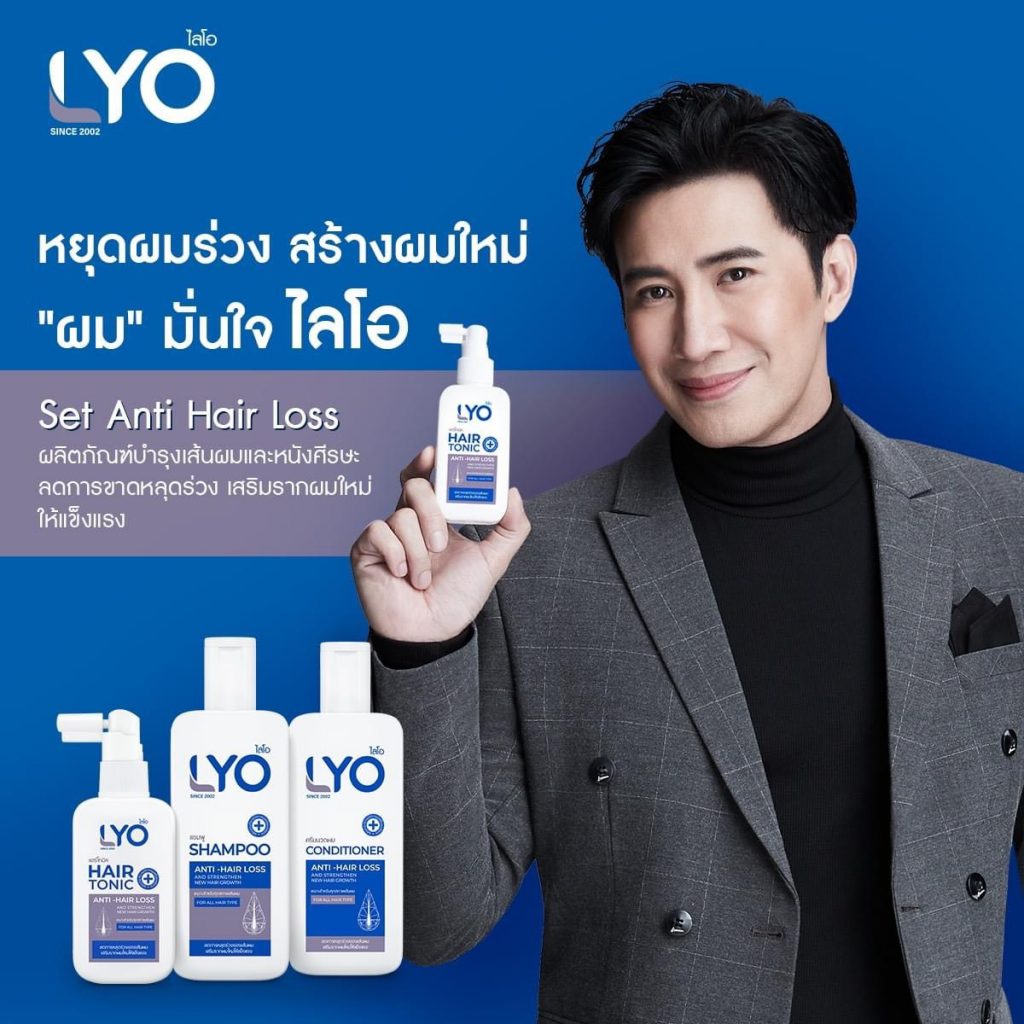
4. ชุดโปรโมชั่น ซื้อ 1 แถม 2 ราคา 1,980 บาท (จากปกติ 3,370 บาท) เป็นเซทโปรโมชั่นที่ขายดีที่สุด และคุ้มค่าที่สุดในตอนนี้ สิ่งที่คุณจะได้รับคือ
1) ไลโอแฮร์ โทน ิคLYO Hair Tonic ขนาด 100 มล. จำนวน 1 ขวด2) ไลโอแชมพูLYO Shampoo ขนาด 200 มล. จำนวน 1 ขวด3) ไลโอครีมนวด ผมLYO Conditioner ขนาด 200 มล. จำนวน 1 ขวด4) ส่งฟรีทุกออ เดอร์ ทั่วประเทศ5) มีบริการ เก็บเงินปลายทาง
หมายเหตุ: เพื่อเพิ่มประสิทธิภาพในการดูแลเส้นผมและหนังศีรษะ ควรใช้ไลโอแชมพู ไลโอครีมนวดผม และไลโอแฮร์โทนิค ในสูตรเดียวกัน